Progressive Web Apps (PWAs) are an efficient way to reach users with almost the same capabilities of platform-specific apps. I think it’s a good practice to turn websites and web apps into PWAs. Even if installability is not something we want, PWAs are still more reliable than regular web apps as they allow users fast and dependable experience regardless of network. I synthesized my experience with PWAs into a workflow.
Step 1: Generate a Lighthouse PWA Report
I usually start by reviewing the current state of the site/app I’m working on through Chrome lighthouse audits. It’s a good exercise to understand PWA.
- In the lighthouse section of Chrome’s developer tools, check Progressive Web App and uncheck others to have a specific focus.
- Run the audit and save the report locally for future reference.
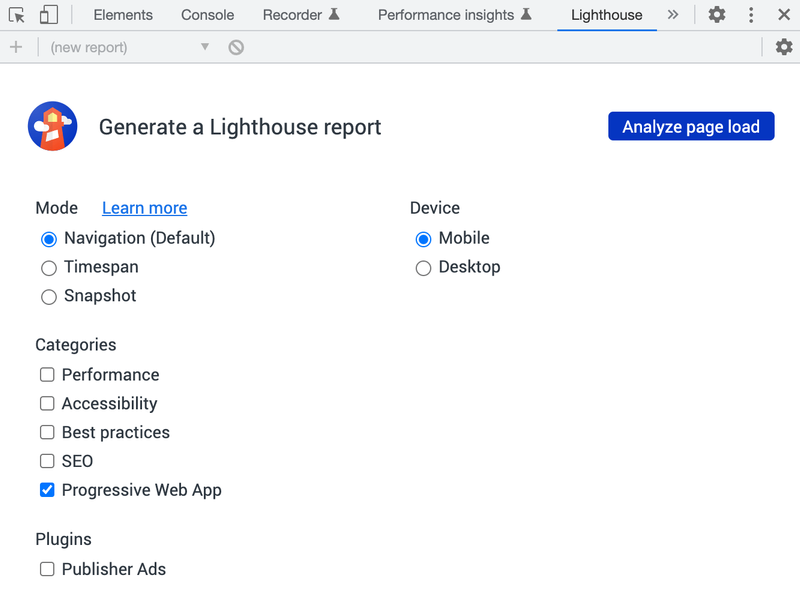
Generally, the audit recommendations can be divided into three major groups: manifest, service worker, and secure HTTPS. The core and optimal PWA checklists provide more context on the recommendations.
Step 2: Create a Manifest File
The web app manifest is a JSON file that tells the browser about your PWA and how it should behave when installed on the user’s device.
With modern frontend libraries/frameworks, the file is usually generated automatically or added through a plugin. For example, create-react-app generates it at public/manifest.json. If not, check out the following steps.
A typical manifest looks like this:
{
  "short_name": "Boba Finder",
  "name": "Boba Near Me",
  "icons": [
    {
      "src": "/images/icons-vector.svg",
      "type": "image/svg+xml",
      "sizes": "512x512"
    },
    {
      "src": "/images/icons-192.png",
      "type": "image/png",
      "sizes": "192x192"
    },
    {
      "src": "/images/icons-512.png",
      "type": "image/png",
      "sizes": "512x512"
    }
  ],
  "id": "/",
  "start_url": "/",
  "background_color": "#b0906f",
  "display": "standalone",
  "scope": "/",
  "theme_color": "#b0906f",
  "shortcuts": [
    {
      "name": "Order from nearest boba spot",
      "short_name": "Order",
      "description": "Place order an order for burnt brown sugar boba tea with 30% sugar and ice from the nearest boba spot",
      "url": "/order",
      "icons": [{ "src": "/images/order.png", "sizes": "192x192" }]
    }
  ],
  "description": "Locate boba spots in vicinity",
  "screenshots": [
    {
      "src": "/images/screenshot1.png",
      "type": "image/png",
      "sizes": "540x720"
    },
    {
      "src": "/images/screenshot2.jpg",
      "type": "image/jpg",
      "sizes": "540x720"
    }
  ]
}
Must-Haves
short_name and/or name: do not repeat them in index.html’s <title> if your app runs in standalone mode. Chrome will prepend short_name or name to what’s specified in the <title>.
icons: used on the home screen, task switcher and/or system preferences.
- must include
src,sizesandtype. - provide icons in different sizes for different contexts.
start_url: required to tell browser where your app should start when it’s launched.
background_color: used as the background color for splash screen when app is first launched on mobile.
theme_color: match it with the index.html’s <meta> tag for theme-color; does not support media queries currently, unlike the <meta> tag.
Nice-To-Haves
id: this is a recent addition to the specification and currently not required. It’s used by browser to uniquely identify the PWA when installed.
display: used to customize browser UI and takes the following values.
- fullscreen: no browser UI and takes up entire display area.
- standalone: app runs in its own window and hides browser UI elements, e.g., address bar, just like a standalone app.
- minimal-ui: similar to standalone but includes minimal browser UI elements for nav, e.g., back and reload.
- browser: plain old browser tab.
scope: if not included, the implied scope is the directory where the manifest file locates.
- When user clicks on a link that navigates outside of
scope, the link is rendered within the PWA window. Addtarget=_blankto the<a>tag for the links to be opened in a separate browser window.
shortcuts: used to provide quick access to common actions that users need frequently.
description and screenshots: used only in Chrome for Android when a user wants to install your app.
Step 3: Adjust html Head Tag
Make necessary adjustments to the <head> tag in index.html so the app is installable. Here’s a pretty comprehensive list to choose from.
<!-- Must -->
<meta charset="utf-8" />
<meta http-equiv="X-UA-Compatible" content="IE=edge" />
<meta
  name="viewport"
  content="viewport-fit=cover, width=device-width, initial-scale=1.0, minimum-scale=1.0, maximum-scale=1.0, user-scalable=no"
/>
<meta name="description" content="Description" />
<meta name="keywords" content="Keywords" />
<title>Title</title>

<!-- Android  -->
<meta name="theme-color" content="#fff" />
<meta name="mobile-web-app-capable" content="yes" />

<!-- iOS -->
<link rel="apple-touch-icon" sizes="180x180" href="%PUBLIC_URL%/assets/icon/icon-180x180.png">
<meta name="apple-mobile-web-app-title" content="Application Title" />
<meta name="apple-mobile-web-app-capable" content="yes" />
<meta name="apple-mobile-web-app-status-bar-style" content="default" />

<!-- Pinned Sites  -->
<meta name="application-name" content="Application Name" />
<meta name="msapplication-tooltip" content="Tooltip Text" />
<meta name="msapplication-starturl" content="/" />

<!-- Tap highlighting  -->
<meta name="msapplication-tap-highlight" content="no" />

<!-- Disable night mode for this page  -->
<meta name="nightmode" content="enable/disable" />

<!-- Fitscreen  -->
<meta name="viewport" content="uc-fitscreen=yes" />

<!-- Layout mode -->
<meta name="layoutmode" content="fitscreen/standard" />

<!-- imagemode - show image even in text only mode  -->
<meta name="imagemode" content="force" />

<!-- Orientation  -->
<meta name="screen-orientation" content="portrait" />
Step 4: Generate and Register Service Worker
Service workers act as proxies between web browsers and web servers. They take the form of a JavaScript file that can be registered with a web browser and provide incredible utilities for offline support, background data synchronization, and push notifications. The technology is a big topic and I won’t go into details here. If you’re interested, check out Service Worker Overview.
While the capabilities of service workers are impressive, the API is extremely low-level and tricky to work with. In practice, you’d want to use Google’s Workbox to simplify common service worker routing and caching. For example, workbox-build offers a couple of methods that can generate a service worker that pre-caches specified assets. It’s widely used by popular frameworks under the hood. Here’s a list of framework integrations.
In addition, here’s a few examples of how to generate the service worker and register it in the browser with common tooling.
With Create React App
create-react-app ships with Workbox by default, which gives you a src/service-worker.ts file that serves as a good starting point. However, create-react-app doesn’t register the service worker by default. Look for the following in the src/index.ts file and change unregister() to register() to opt in offline-first behavior:
// If you want your app to work offline and load faster, you can change
// unregister() to register() below. Note this comes with some pitfalls.
// Learn more about service workers: https://cra.link/PWA
serviceWorkerRegistration.unregister();
With Vite Plugin PWA
This is a framework-agnostic plugin for Vite. If you use Vite as your development environment, you can install it by:
npm i vite-plugin-pwa -DThen add the following to your vite.config.ts file:
import { VitePWA } from 'vite-plugin-pwa';

export default defineConfig({
  plugins: [
    VitePWA()
  ]
});
Step 5: Verify Service Worker Registration
Using a service worker in development can lead to extremely confusing debugging situations. Frameworks usually have them turned off in dev mode on purpose. So how do we verify that the service workers we generated are actually registered and working in the browser?
I usually use the serve npm package to serve the production build so I can verify service workers locally. This can be done through the scripts below. Note your build script may be different. Check your package.json file.
npm i serve -g
npm run build
serve -s build
Then go to the developer tools in your browser and navigate to the Application tab. You should see a service worker listed under the Service Workers section.
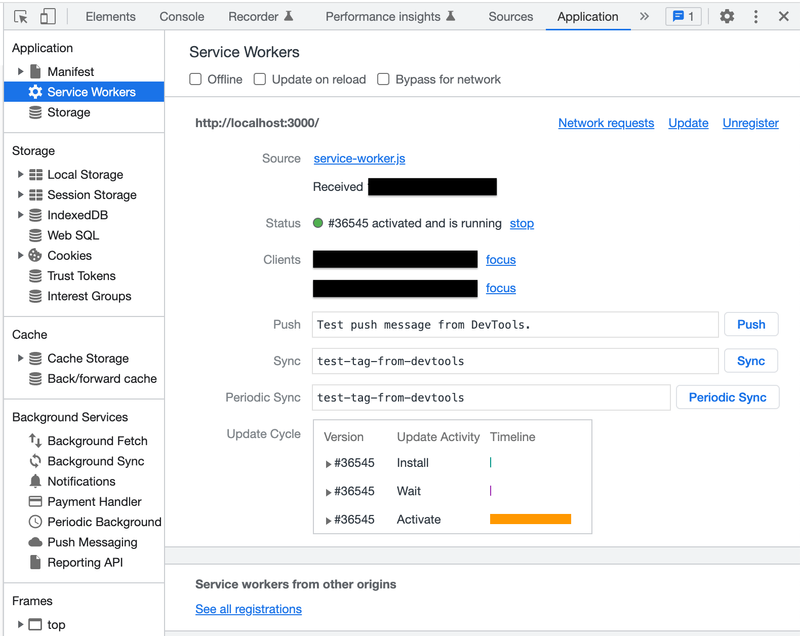
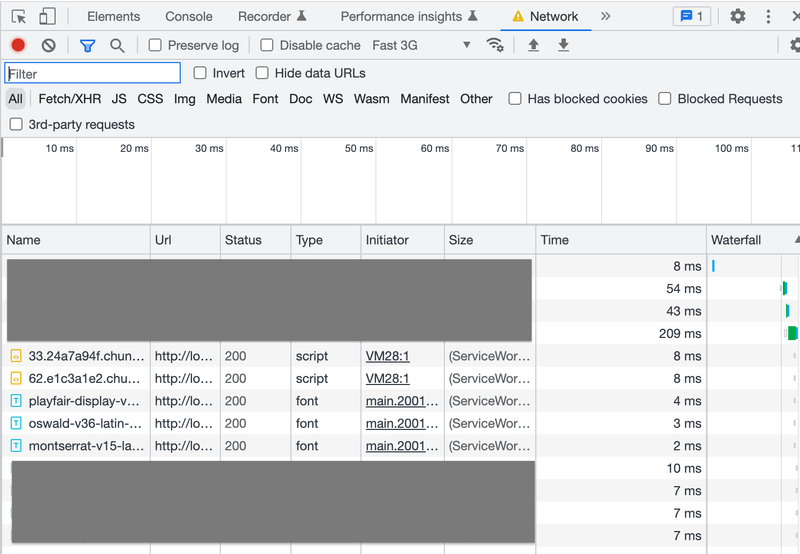
Additionally, you can verify that the service worker is caching assets by opening the Network tab and refreshing the page. You should see the service worker intercepting requests and serving cached assets, including hashed chunks of JavaScript.
Step 6: Get A Lighthouse Score of 100
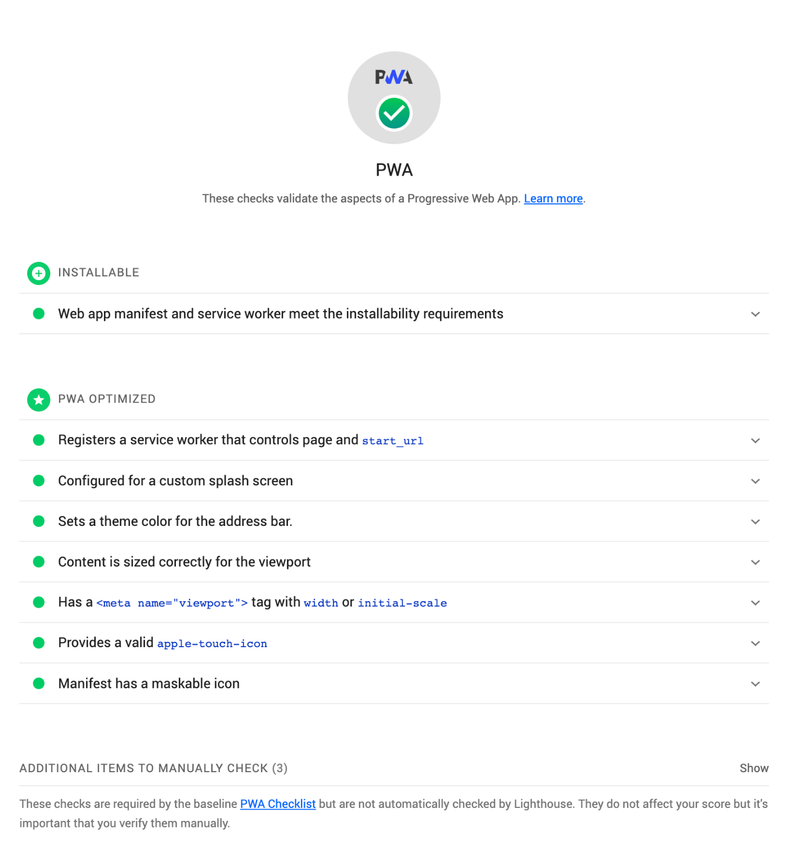
At this point, we’ve completed all necessary steps for a PWA required by browsers. Let’s run the Lighthouse audit to see how our app performs. Repeat step 1 to generate another Lighthouse report. You should see a score of 100 for the Progressive Web App category.
Step 7: Prompt Users to Update Service Worker When Shipping New Versions
When we ship new versions, a new service worker will be generated and installed in the browser. However, it doesn’t mean that users will immediately see the new version of our app. It’s because the new service worker might be kept in the “waiting” state until all existing, open tabs are closed (reload is not enough). In fact, this is the default behavior of create-react-app.
This can lead to bad user experience because users may see outdated content. Sometimes VERY outdated. You could imagine a scenario where you visit a page on your phone, instead of closing the tab, you just leave the browser when you want to go to other apps. Or you have bookmarked the page on your phone’s home screen. In this case, you will always see the cached assets.
To visualize the service worker in waiting, build your app and serve it locally as mentioned in the previous step. Open the app in your browser. Keep your tab open while you make some updates to your build and serve it again. You will see a new service worker in “waiting” state after you reload/soft-refresh your tab and your updates are not reflected on the page.
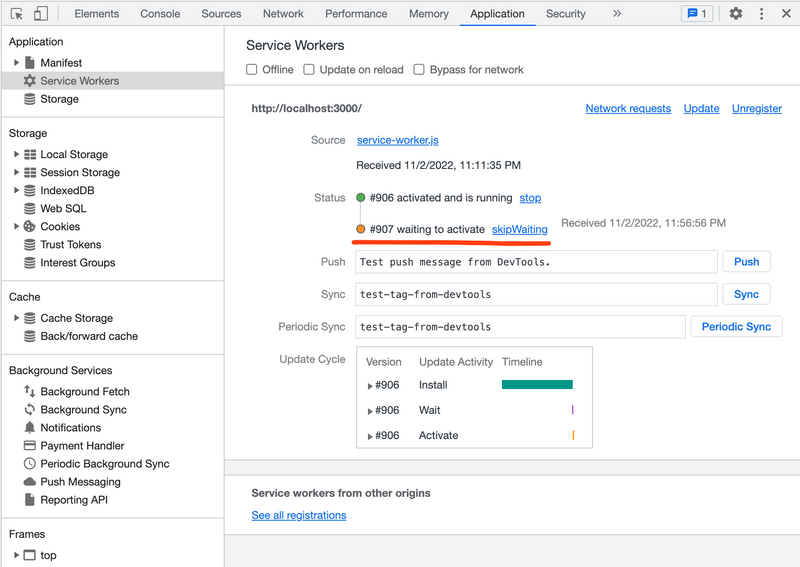
Clicking on the “skipWaiting” button will force the waiting service worker to become active so we can see fresh content. However, we should never expect that our users need to open the developer tools to be able to use our app.
To prevent this, we can present a prompt to ask users to make the new service worker active and reload the page as they see fit.
If you used create-react-app, look for the following code in src/service-worker.ts:
// self is the service worker's global scope
self.addEventListener('message', (event) => {
  if (event.data && event.data.type === 'SKIP_WAITING')
    self.skipWaiting();
});
The skipWaiting() function here has the same effect as clicking the “skipWiting” button, and it’s triggered by a message with a data type of SKIP_WAITING. So we just need to expose a button for users to send this message. For example:
import { useIonToast } from '@ionic/react';
...

const [present] = useIonToast();

present({
  message: 'New version available. Refresh to update.',
  buttons: [
    {
      icon: refresh as any,
      handler: () => (registration.waiting?.postMessage({ type: 'SKIP_WAITING' }));
    }
  ]
});
I’m using Ionic’s useIonToast hook to present a toast with a button for users to send a message to the service worker and tell it to skip waiting and become active. This can of course be done by different UI libraries or even an alert box.
You might wonder where the registration is from in the above example. It turns out that we have access to the service worker when we register it in src/index.tsx:
import * as serviceWorkerRegistration from './serviceWorkerRegistration';
...
serviceWorkerRegistration.register();
Go to the src/serviceWorkerRegistration.ts file where the above function is defined. You’ll notice that the function expects an optional config object as an argument. In the object, we can pass in callback functions to handle service worker registration onSuccess and onUpdate. The callback functions will receive the registration itself as an argument. Check out ServiceWorkerRegistration for the complete interface definition.
So whenever the service worker registration updates, we can present the toast as shown above:
import { useIonToast } from '@ionic/react';

// relocate service worker registration from index.ts to App.ts so we can use UI components for prompts
import * as serviceWorkerRegistration from '../../serviceWorkerRegistration';

const App: React.FC = () => {
  const [present] = useIonToast();

  ...

    useEffect(() => {
    serviceWorkerRegistration.register({
      // the function is called when there's an updated service worker
      onUpdate: (registration: ServiceWorkerRegistration) => {
        present({
          message: 'New version available. Refresh to update.',
          buttons: [
            {
              icon: refresh as any,
              handler: () => {
                registration.waiting?.postMessage({ type: 'SKIP_WAITING' })
              };
            }
          ]
        });
      },
    });
  }, []);

  ...

}
Once the new service worker is activated, the page needs to be reloaded for users to see the new version of the app. We can listen to the service registration’s stateChange event and trigger a reload if its state changes to activated:
// once the waiting service worker becomes the active one, force reload the app for new content
registration.waiting?.addEventListener('statechange', (event) => {
  if (event.target?.state === 'activated') {
    window.location.reload();
  }
});
To clean every thing up, let’s make separate functions as the service worker registration callback:
import { useIonToast } from '@ionic/react';

import * as serviceWorkerRegistration from '../../serviceWorkerRegistration';

const App: React.FC = () => {
  const [present] = useIonToast();

  ...

  const handleServiceWorkerUpdate = (registration: ServiceWorkerRegistration) => {
    registration.waiting?.postMessage({ type: 'SKIP_WAITING' });

    registration.waiting?.addEventListener('statechange', (event) => {
      if (event.target?.state === 'activated') {
        window.location.reload();
      }
    });
  };

  const presentUpdatePrompt = (registration: ServiceWorkerRegistration) => {
    present({
      message: 'New version available. Refresh to update.',
      buttons: [
        {
          icon: refresh as any,
          handler: (registration) => handleServiceWorkerUpdate(registration),
        }
      ]
    });
  };

  useEffect(() => {
    serviceWorkerRegistration.register({
      onUpdate: (registration) => presentUpdatePrompt(registration),
    });
  }, []);

  ...

}
Now we have a fully functional service worker that can be activated by the user’s command and the page can be reloaded to show the new version of our app.
Step 8: Handle Ignored Update Prompts
If the user ignores our prompt to update the app, then they leave the browser and come back again without closing the tab, they will never see the prompt again, because the service worker registration’s onUpdate callback won’t fire anymore. You can persist the toast message on the UI until the user clicks refresh, but it might distract the user from their current task.
Luckily, we can customize the service worker registration to expose a callback whenever there’s a waiting service worker. If you look into the registerValidSW() function in src/serviceWorkerRegistration.ts, you’ll see that it executes callbacks on the service worker’s state change and the callbacks are specified by us in the config object. For example:
...
if (config && config.onUpdate)
  config.onUpdate(registration);
...
We can add code to execute a onWaiting callback to the registerValidSW() function:
...

// Execute callback
if (config && config.onUpdate)
  config.onUpdate(registration);

// Custom callback
if (registration.waiting) {
  if (config && config.onWaiting) {
    config.onWaiting(registration);
  }
}

...
Now we can pass in the onWaiting callback function to the service worker registration in App.ts:
...

useEffect(() => {
  serviceWorkerRegistration.register({
    onUpdate: (registration) => presentUpdatePrompt(registration),
    onWaiting: (registration) => presentUpdatePrompt(registration),
  });
}, []);

...
So whenever the user opens our app and there’s a waiting service worker, they will see this prompt to activate service worker and reload page for new content.
That’s It!
This is the end of my workflow. I hope you find it useful. If you have any questions or suggestions, DM me for now. I’ll build a comment section soon!